Deploying a Quarto Website with GitLab Pages
Introduction
Note: this post was originally titled “Deploying a Blogdown Website with GitLab Pages”. Recently, I have migrated my blog to Quarto, so I modified the title and some content of this post to reflect the change.
GitLab Pages is a feature that allows you to automate the process of building a static website and publishing it on a server, directly from a repository in GitLab. This is accomplished through a tool called GitLab CI/CD. When the process is completed, the website can be accessed through a domain offered by GitLab; optionally, you can add a custom domain and enable the HTTPS protocol. In this post, I will share the details of deploying a website generated by Quarto using Gitlab Pages.
Prerequisites
Before proceeding, you should know how to: create a git repository to track the source files of your website; create a corresponding project in GitLab and push commits to it. Instructions on how to accomplish these steps are out of the scope of this post. I refer readers in need to some useful documentations (e.g., this and this).
Setting up GitLab CI/CD
To set up GitLab CI/CD, we need a yaml file called .gitlab-ci.yml, which should be placed in the root directory of the project that holds your website’s source files. This file specifies the commands to be executed in a Docker container on GitLab to build your website. Here is what is inside the .gitlab-ci.yml file that I use to build my blog:
variables:
  UBUNTU_VERSION: "22.04"
  QUARTO_VERSION: "1.3.361"

image: ubuntu:${UBUNTU_VERSION}

before_script:
  - apt-get update && apt-get -y install curl
  - curl -L -o ./quarto.deb https://github.com/quarto-dev/quarto-cli/releases/download/v${QUARTO_VERSION}/quarto-${QUARTO_VERSION}-linux-amd64.deb
  - dpkg -i ./quarto.deb && rm -f ./quarto.deb
  - quarto install --no-prompt extension quarto-ext/lightbox

pages:
  script:
    - quarto render . --output-dir=public/
  artifacts:
    paths:
      - public/
  only:
    - main
The variables section defines which version of Ubuntu and Quarto to be used. The image section defines the base docker image to be used. The before_script section includes commands to install quarto and extensions that will be used to build the website. Finally, the build process will be completed by a job called pages. In this section, the command quarto render . --output-dir=public/ is executed and the generated website files will stored in a directory named public/. The artifacts subsection indicates where to find the files (i.e., public/), which will then be uploaded to the GitLab Pages server. Additionally, the process will only be performed on the main branch, which is what the only subsection specifies. The official documentation of GitLab offers more details on how to tweak the .gitlab-ci.yml file.
After the above configuration, when I push commits to GitLab, my website will be automatically built. If the build is successful, then I can access my blog via https://<username>.gitlab.io/ if it is a user page; or https://<username>.gitlab.io/<projectname>/ if it is a project page (what is the difference?).
Note that by default, a static site generator (e.g., Quarto) expects to find your website under a domain (e.g., https://<username>.gitlab.io/), not in a subdirectory of that domain (e.g., https://<username>.gitlab.io/<projectname>). Therefore, whenever you want to publish a project page, you’ll first have to configure the baseurl to reflect this pattern. To do this for Quarto, you can set the parameter site-url in the _quarto.yml file to https://<username>.gitlab.io/<projectname>/.
That is it. If you don’t need a custom domain for your website, then the above configuration is all you need to get the site published on GitLab Pages server. However, if you do want to use a custom domain for your website, then please continue reading.
Adding a custom domain and enabling HTTPS protocol
Note that the following content requires some knowledge on domain name, DNS web service and the HTTPS protocol. If you are confused, you may find this documentation to be useful.
Cloudflare is a network platform that provides free DNS service and SSL/TLS Certificates. The following instructions on how to add a custom domain to a GitLab Pages and enable HTTPS are based on cloudflare.
First, login to cloudflare, go to the control panel of your domain, and:
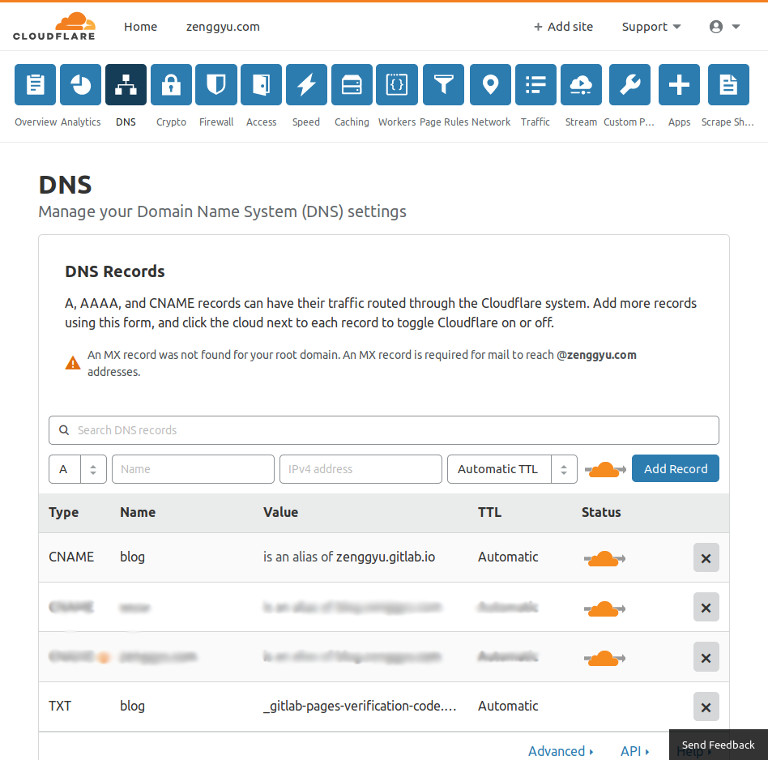
- Navigate to the DNS tab and create a new
CNAMErecord pointing a custom domain (e.g.,blog.zenggyu.com) to the GitLab Pages domain (e.g.,zenggyu.gitlab.io) ( Figure 1 ).
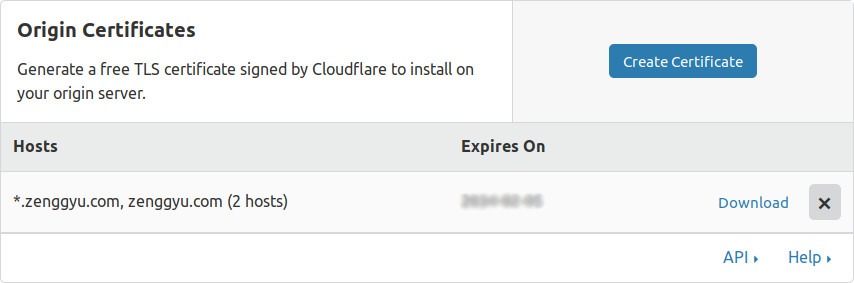
- Navigate to the Crypto tab; then, in the Origin Certificates section, click the Create Certificate button and generate an RSA private key and a CSR ( Figure 2 ); copy the generated certificate and private key for use in GitLab.
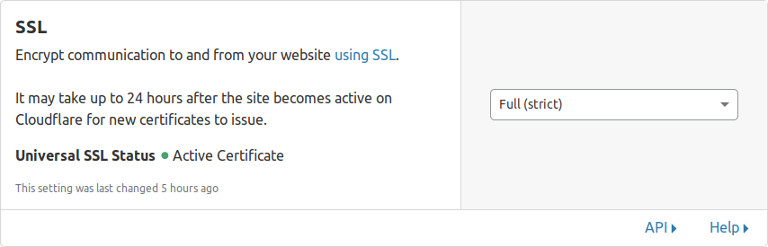
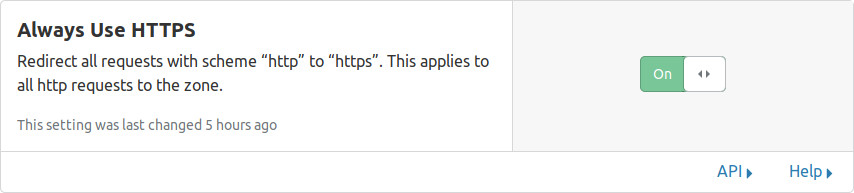
- In the same section, make sure that SSL mode is Full (strict), and that Always Use HTTPS is On ( Figure 3 and Figure 4 ).
Then, login to GitLab, and:
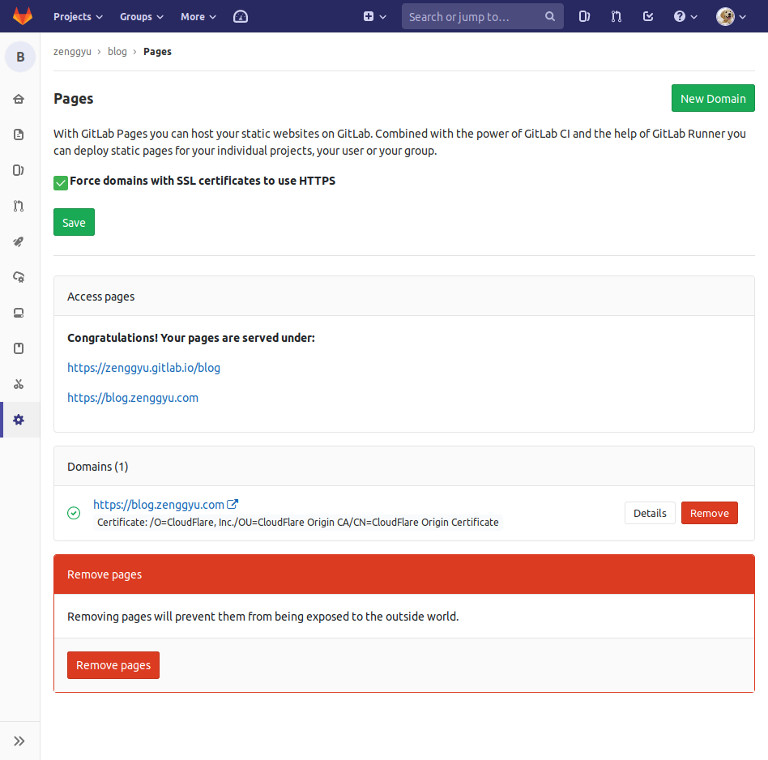
- Go to Settings > Pages from your project’s dashboard and click the New Domain button ( Figure 5 ); add the custom domain, the certificate1 and private key and click Create New Domain.
- Check the verification status of the custom domain and copy the verification code for use in the following step.
1 Note that since cloudflare doesn’t combine both PEM and root certificates in one, so we need to copy the root certificate (aka “intermediate”) from here and paste it below the certificate.
Go back to cloudflare, and:
- Navigate to the DNS tab and create a new
TXTrecord for the custom domain, with the verification code ( Figure 1 ).
Finally, go back to GitLab, and:
- Verify the ownership of the custom domain.
- Make sure that Force domains with SSL certificates to use HTTPS is checked ( Figure 5 ).
Note that DNS propagation needs some time to take effect. So don’t worry if you can’t access your website via your custom domain instantaneously. Just wait for some time and check it again.
Additional notes
When using GitLab CI/CD to build the website, you need to make sure all the content generated by code can be reproduced on the server; otherwise, the build process won’t succeed. To reduce complexity in maintenance, keep executable code in
.qmdfiles as few as possible.Remember to configure the settings so that requests always uses the HTTPS protocol to avoid redirect loop.
To publish a plain website without a static site generator, just move the content to a directory named
public/and specify the path to theartifactsin.gitlab-ci.yml. Here is an example:pages: stage: deploy script: - mkdir .public - cp -r * .public - mv .public public artifacts: paths: - public only: - master